by Mike Elliott, Kettle River Canoes
While repairing your wood-canvas canoe, you may come across some ribs that are perfectly good except for a small portion attached to the inwale. Rather than replacing the ribs, it is possible to repair the rib-tops.
First of all, you need access to a substantial portion of the damaged ribs in order to do the repair. Remove the planking along the sheer line to expose all of the damaged rib-tops. Identify each piece of planking as it comes off since you may be able to replace the original pieces once the repairs are completed.
Now, machine new cedar to replace the damaged rib-tops. Sometimes the rib-tops are tapered, so make sure each replacement piece is cut and shaped to match the original wood.
Cut the rotted top off the rib to be repaired. I use a Japanese utility saw with 14 teeth per inch.
Create a scarf angle in the original rib. For a solid scarf joint, the glued surface ought to be at least six times that of the rib thickness. Therefore, ribs 3/8” thick have a scarf angle with a surface area approximately 2¼” long. You can use a rasp to make the scarf. I use a 4” angle grinder that is set up with a 24-grit sandpaper disc. It makes quick work of the job – perhaps too quick, so careful attention and a light touch are needed.
Line up the new wood with the original rib and mark the location of the matching scarf.
Create the matching scarf in the new cedar.
Glue the new wood to the original rib and clamp it in place with spring clamps. I use either a water-proof resorcinol glue (such as Weldwood or Dural) or a polyurethane glue (such as Gorilla Glue). The resorcinol glues are water-based which makes clean-up a breeze. After clamping the new piece in place, wipe away any excess glue with a damp rag. When dry, it sands easily and blends well with the wood. Polyurethane glue sets more quickly, sands easily once cured and creates a very strong bond. Lacquer Thinner is used to clean up polyurethane glues. I use these two glues interchangeably.
The repaired rib-top is fairly rough at first.
However, a quick sanding evens out the joint and creates a clean repair.
Attach the rib-top to the inwale (I use 7/8” 14-gauge bronze ring nails, copper canoe nails or brass canoe tacks) and trim the rib-top flush with the top edge of the inwale.
When faced with rib-top repairs next to each other, it is easiest to do every second rib-top to avoid clamping difficulties. Therefore, it takes a couple of days to complete all of the repairs.
If most of the rib-tops in your canoe are rotted, it is still possible to repair the ribs rather than replace every rib in the canoe. Since every rib will be cut, the original sheer-line will be lost. Therefore, the first step is to establish a reference line for the sheer-line. Go around the canoe with a carpenter’s pencil and mark a position 5” below the top of each rib. Where the entire top of the rib has rotted away, skip to the next rib and mark the reference point there. This will give you enough reference points to create a fair line the full length of the canoe. Now, tack a spruce batten (approximately ¼” x ¾” x 16’) at the reference points to create a fair reference line.
As mentioned before, every second rib will be repaired. Unless you have hundreds of 3” spring clamps, it will take a week or two to splice new wood into every rib. Once done, mark each new rib-top 5” above the reference line and cut every rib to re-create the original sheer-line of the canoe.
Reattach the original planking and replace damaged planking with new cedar. Stain the new wood to match wood in the rest of the canoe.
The finished product is strong and solid. Many of the rib-tops repairs extend less than an inch below the inwales, so it was difficult to realize that they had been replaced.
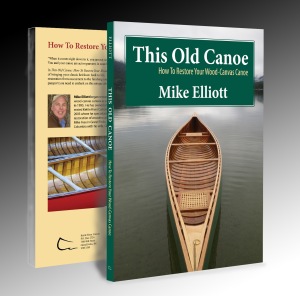
All of this (and much more) is described in my book – This Old Canoe: How To Restore Your Wood Canvas Canoe. If you live in Canada, the book will be available in about a week. Click here to order the book. If you live in the USA, the book is available now. Click here to order the book.


